
This is not a tutorial nor am I an expert in anything here. I am learning and documenting as I learn. Things here may be wrong, feel free to point them out and reach out to me :)
Introduction
One of the things I have been tasked with lately is creating a way to authenticate a users wallet address, I had created a method for extracting a users address after connecting it via the window.cardano that is injected into webpages with any of the Cardano wallet browser extensions. For what we needed this was sufficient but now we need something way more secure. As you all know anything that is solely provided by the client is about as trustworthy as gas station sushi. So here is what I have done to secure wallet authentication.
Frontend
So the first thing we need to do is prompt the user to connect their wallet. The way to do this is to use browserify and bundle the required Cardano serialization libraries as well as any additional auxiliary code that will assist in prompting and extracting the necessary data from users. Luckily I have a git repo that contains all of the libraries I need to create this single js library for our frontend, said repo can be found here. Since the demo thus far was only made for NAMI that is what this article will show, but the process is the same simply check the browser for additional wallets and adjust the code accordingly. So first we must connect the user’s wallet to the webpage with the following:
1
2
3
4
5
6
7
8
9
10
11
12
13
14
15
16
17
18
19
20
21
22
23
24
25
26
27
28
29
30
31
window.returnWallets = function() {
    let wallet_arr = [];

    if (window?.cardano?.nami != undefined)
        wallet_arr.push(window?.cardano?.nami);
    if (window?.cardano?.eternl != undefined)
        wallet_arr.push(window?.cardano?.eternl);
    if (window?.cardano?.flint != undefined)
        wallet_arr.push(window?.cardano?.flint);
    if (window?.cardano?.yoroi != undefined)
        wallet_arr.push(window?.cardano?.yoroi);
    if (window?.cardano?.typon != undefined)
        wallet_arr.push(window?.cardano?.typon);

    return wallet_arr;
}

window.enableWallet = async function(wallet) {
    let x = await wallet.isEnabled();
    let myWallet = undefined;
    myWallet = new Promise(function(resolve, reject) {
        if (x == false) {
            wallet.enable().then((res) => {
                resolve(wallet)
            });
        }
        else {
            myWallet = resolve(wallet)
        }
    });
}
So this is obviously a hacky way of attaching functions to the webpage, but for now, this is what I have. I’m not too good with javascript so there are likely a million things wrong with this, ik,ik. So what does the code do? the first global function returnWallets does what its name suggests, it checks to see if the wallets are present and returns the array of said wallets. The function enableWallet is then passed to any of the elements in the array provided by returnWallets. The user will be then prompted to connect to either wallet. 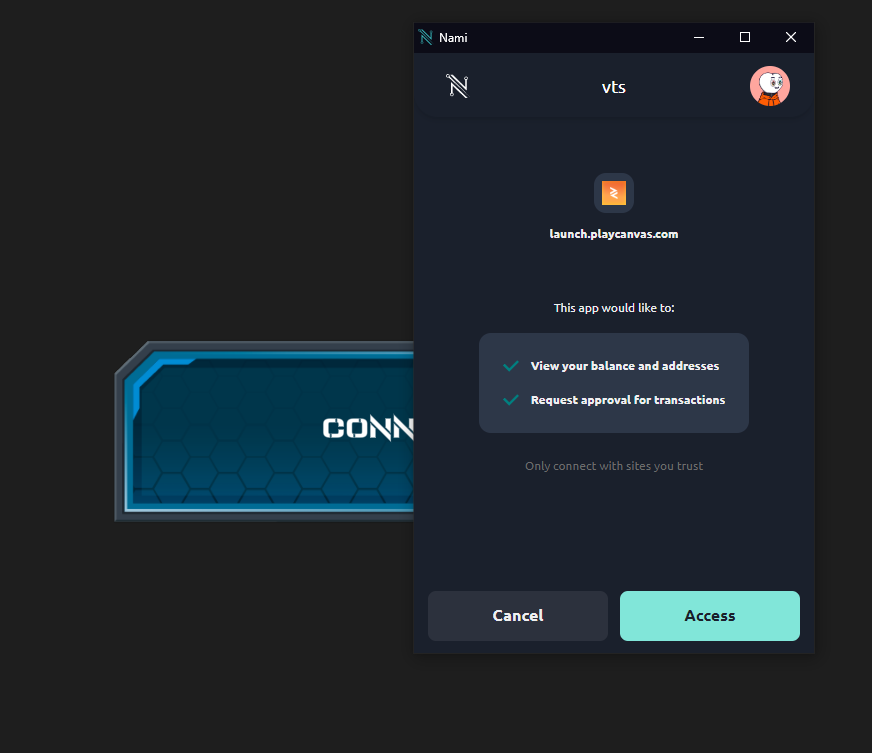
Next the thing we to do is extract the address from the wallet with the following code.
1
2
3
4
5
6
7
8
9
10
11
12
13
14
15
16
17
18
19
20
21
window.getWalletAddress = async function(wallet) {
    const mywallet = await wallet;
    const api = await mywallet.enable();
    let addr = "";
    let walletAddress = undefined;
    walletAddress = new Promise(function(resolve, reject) {
        if (mywallet.name == "Nami") {
            api.getUsedAddresses().then((res) => {
                addr = wasm.Address.from_bytes(Buffer.from(res[0], 'hex'));
                resolve(addr.to_bech32());
            });
        }
        else {
            api.getUnusedAddresses().then((res) => {
                addr = wasm.Address.from_bytes(Buffer.from(res[0], 'hex'));
                resolve(addr.to_bech32());
            });
        }
    });
    return walletAddress;
}
Things to note with the getWalletAddress is that since NAMI is currently the only wallet to use a single address for everything, we face potential concurrency issues since other wallet’s address may have changed since the last time they used our app. This would require some refactoring to use something more stable like a reward address/staking address that doesn’t change, but for the demo what we have here will suffice. So once after connecting the wallet to the webpage we now extract the address. Now we need to move on to the actual implementation as this is all mostly auxiliary. I’ve decided to paste the code in its entirety and will explain the logic below.
1
2
3
4
5
6
7
8
9
10
11
12
13
14
15
16
17
18
Button.prototype.initialize = function() {
    this.entity.button.on('click', async function() {
        let wallet = window.enableWallet((window.returnWallets()[0]));
        let addr = await window.getWalletAddress(wallet);

        axios({method: 'post', url: 'https://auth.xxxxx.xxxx/route1',
            data: {"address": addr}
        }).then(async function (res) {
            let signed = await window.signData(wallet, "Verify wallet: "+res.data);

            axios({method: 'post', url: 'https://auth.xxxxx.xxxx/route2',
                data: {"signedData": signed}
            }).then(async function (res) {
                console.log(res.data);
            });
        });
    });
};
Right off the bat, this looks like weird javascript. That’s because I have been testing this on the javascript game engine playcanvas. regardless the underlying idea is the same across all web services. So the first thing is we are creating a button that will when clicked, will use our predefined auxiliary functions to extract the wallet’s address and send it to our authentication server the server will take this address and internally store this along with some randomly generated data. This data is then sent back to the user where the user is then prompted to sign the data with either private key. The idea is that since it was signed with a private key we can trust that the address is what the client is claiming it to be. 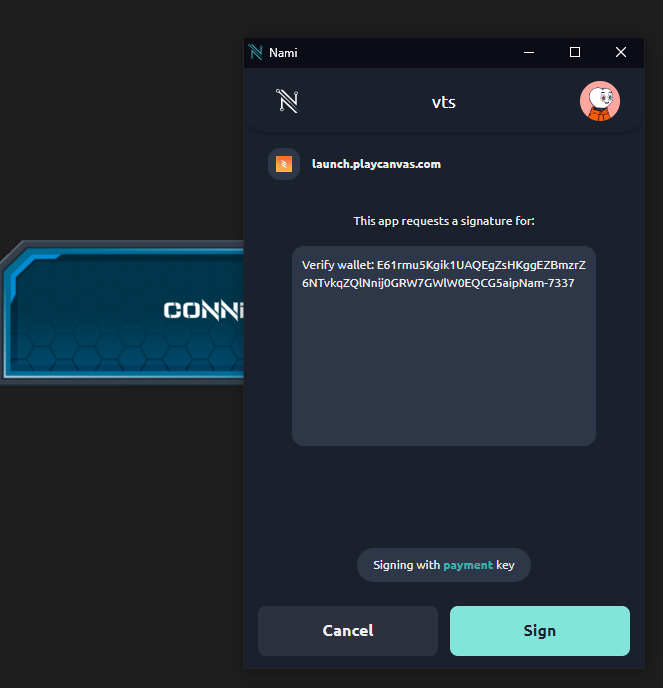
Once signed the client sends the signed data back to the authentication server and verified. If the decoded signed data matches the data we have on file then we know the address is valid.
Backend
On the backend, we have a few things going first we need a route to initiate our ‘ handshake’ here we do some basic error checking although we should check that a wallet is a valid Cardano address but for now this will do.
1
2
3
4
5
6
7
8
9
10
11
12
app.post('/route1', (req, res) => {
    let address = req.body['address'];
    if (address != ""){
        let data = randomData(64);

        walletDict[req.body['address']] = data;
        res.send(data+"sentinel");
    }
    else {
        res.sendStatus(400);
    }
});
Here we check the incoming request for an address if one is not present return a 400 code. If one is present we then generate a 64-char string of random data and store it in a dictionary where the key is the address provided. We then send it back to the user along with a sentinel value so that we can parse this later.
Next, we need a route that will accept the signed data and ping our Nakama server if the data is valid once verified, if the data passes we then want to use that address to fetch or create our Nakama account, otherwise we return some error code.
1
2
3
4
5
6
7
8
9
10
11
12
13
14
15
app.post('/route2', async (req, res) => {
    let result = verify(req.body['signedData']['signature']);
    if (result != null) {
        try {
        let session = await getNakamaAccount(result);
        res.send(session);
        } catch (err) {
            console.log(err);
        }
    }
    else{
        res.sendStatus(400)
    }
});
The previous code snippet contains two auxiliary functions that probably need some explaining. first, we’ll start with verify what this function does is evaluate the signed data and return the address if they match otherwise it will return null. So this function does kind of a lot of cryptography, but I’ll do my best to break it down.
Cardano uses CBOR (Concise Binary Object Representation) for a lot of the utilities within the Cardano protocol and thusly was chosen for message signing for these browser-based wallets as the necessary libraries had already been created and offered a lot of pros and kept general consistency with the rest of the Cardano ecosystem. Further information can be found at CIP-008 and CIP-0030.
Message signing with Cardano browser wallets uses the CBOR Object Signing and Encryption standard [RFC 8152] more specifically COSESign1 that consists of the following format. 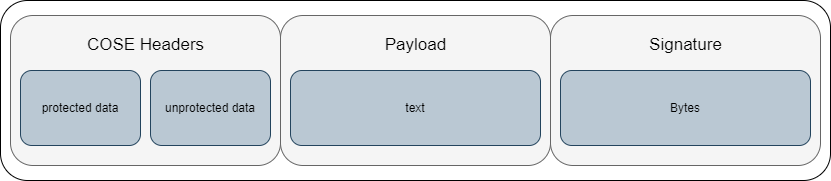 The bulk of our desired data exists in the headers and payload. There we can extract the address at least for NAMI wallets and we can extract the payload which is our random data previously mentioned. I have provided an example of the COSESign1 data after it was parsed by cbor.me from an early test below
1
2
3
4
5
6
7
8
9
10
11
84                                      # array(4)
   58 46                                # bytes(70)
      A201276761646472657373583901F9873A611CC1A1E8557BE0084CA18ACB34AC338026DB8A2A810170F7005FC7BAF6124B5234094853F7A4E1DAD4472DADE47A2C523D4C1E12 # "\xA2\u0001'gaddressX9\u0001\xF9\x87:a\u001C\xC1\xA1\xE8U{\xE0\bL\xA1\x8A\xCB4\xAC3\x80&ۊ*\x81\u0001p\xF7\u0000_Ǻ\xF6\u0012KR4\tHS\xF7\xA4\xE1\xDA\xD4G-\xAD\xE4z,R=L\u001E\u0012"
   A1                                   # map(1)
      66                                # text(6)
         686173686564                   # "hashed"
      F4                                # primitive(20)
   53                                   # bytes(19)
      5665726966792077616C6C65743A2072656565 # "Verify wallet: reee"
   58 40                                # bytes(64)
      2545D73C8136FF8BE9F0678964CE325FE084FE2BD24F8AFE9ADAD3E7EA7BA37A109216F86DBD00B3F3019B37386347AA997C6C54434E2A91DD3C174F64936C00 # "%E\xD7<\x816\xFF\x8B\xE9\xF0g\x89d\xCE2_\xE0\x84\xFE+\xD2O\x8A\xFE\x9A\xDA\xD3\xE7\xEA{\xA3z\u0010\x92\u0016\xF8m\xBD\u0000\xB3\xF3\u0001\x9B78cG\xAA\x99|lTCN*\x91\xDD<\u0017Od\x93l\u0000"
While all the libraries exist and the data is all there for me to do it myself I opted to use an existing library since… well it was there and I wanted to get a jumpstart on using the wallet address to create a user account with Nakama. I do however plan on creating my own implementation later on. The code below uses the node package cip08 which does all that process the data previously mentioned to extract the required information.
1
2
3
4
5
6
7
8
9
10
11
12
13
const verify = (signature) => {
    const builder = CoseSign1.CoseSign1.fromCbor(signature);
    const data = Buffer.from(builder.buildMessage(signature).toString('hex'), 'hex').toString().split('Verify wallet: ')[1].split('-7337')[0];
    const payloadAddress = S.Address.from_bytes(builder.getAddress()).to_bech32();
    console.log(walletDict[payloadAddress.toString()]);
    if (walletDict[payloadAddress.toString()] == data) {
        console.log("match!")
        return payloadAddress.toString();
    }
    else {
        return null;
    }
};
The next auxiliary function we should cover is pretty straightforward. getNakamaAccount simply contacts the Nakama server and asks the server to create and receive the account and return a session object.
1
2
3
4
5
async function getNakamaAccount(address) {
    var client = new Nakama.Client("defaultkey", "nakama.xxxxx.xxxx", "7350", useSSL);
    const session = await client.authenticateCustom(address, true, "accountName");
    return session;
}
That’s basically it, that’s everything. The session object is then returned to the frontend and that should contain the necessary data to allow the user to proceed with our app.